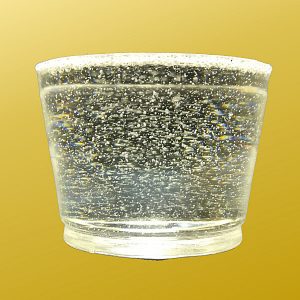
Tips: Bubbles be gone!
Apply all or use only the tips that are practical and make sense to you.
- Cold Temperature is one of the main causes. Resin loves warmth. Ideal room temperature 24-30oC.
If too cold the resin becomes thick and with mixing may even look milky with all the bubbles when really cold. Cold resin will result in thick pours.Suggestion: Warm resin & hardener before mixing. You can put in a warm water bath (tap water – i.e. baby bath temp, so 30-40oC max). One can put the bottles in a plastic bag and then into a bath to avoid water accidentally getting into the bottles or labels coming off. Or pour in separate cups and put in shallow water bath. DO NOT GET WATER IN THE RESIN MIX
IMPORTANT: Warming the resin means the working time is reduced and the warmer the resin the sooner it will set.
One can use a heat pad to put under container, that also works. - Pour resin together on the side of the containers, rather than in the centre. Sometimes difficult but it does eliminate some bubbles.
- Deeper containers are better than a shallow one with big base, as more air is introduced when stirring and scraping off the bottom in a shallow container.
- Stir gently, but thoroughly, scraping the sides and bottom, making sure all is mixed. Usually 3-5 min – can let it stand for a minute or two. Do not whisk it up like and egg. Also keeping spatula/stirring stick to the bottom instead of lifting it out, it stops more air being introduced.
- Use a flat wide spatula or stirring stick rather than a thin one, as it generates fewer bubbles. Apparently silicone/plastic sticks produce fewer bubbles as microbubbles may escape from the wood (personally not noticed).
- When pouring mixed resin into mould, pour on the side and as close to the surface of the flowing resin as possible.
 Some folk like to twirl the mould a bit so it flows over the sides, so bubbles don’t attach to the sides.
There are some that powder the sides of the mould with baby-powder to stop bubbles attaching to the sides (never tried, should be OK with coloured resin, even powdering with pigments, but question the practice with clear resin)- If the stirring stick is left in the container for a minute or two, the bubbles tend to move to the stick and if then removed, lots may be removed from the mixing container.
- Slight flaming of mixing container may help pop surface bubbles.
- When embedding any organic object, e.g. flowers in resin, the object should be sealed first, as micro trapped bubbles can flow from the object into the resin (some use craft sealer sprays or even hairspray). This is especially true of natural dry wood, shells, flowers. MDS seems to be bubble free as compressed during production.
One can even try immersing the item in resin before adding to the mould. A bit tricky when doing multiple layers. - Pop big bubbles with toothpick or stirrer, if at the side, gently scrape away as they surface (they are more likely to surface if the resin is warmer and room is warm)
- You can gently flame the surface – can be tricky is using silicone mould as overheated resin from the flames my bond more to the silicone or silicone can melt. Heat gun or embossing tool is often used.
Give resin time to settle and allow bubble to rise to the top – stop fiddling! - For moulds, one can even warm the mould before doing the pour.
- Pour in layers, thin layers, as it is easier for microbubbles to come to the surface.
- Some folks put any type of vibrating tool on the table next to the mould e.g. electric massager, electric sander, electric drill – the fine vibrations on the table apparently helps to release bubbles, letting them float to the top.